| Lesson Subject:
Stevie Ray Vaughan Style |
| What you learn:
Playing Over A Progression |
| Teacher: Michael Johnson |
Michael: This Stevie Ray Vaughan style lesson
covers many key aspects of Stevie's ability to solo over chord changes. Playing
over the transition of a chord progression allows the guitarist to sound more
melodic, breaking the pattern of playing in one scale throughout the song. This
technique is commonly used by jazz players, but can easily apply to blues and
rock guitar. If you're tired of playing the same key and scale pattern over and
over, this is the lesson for you! This lesson will help break the mold and open
new doors to enhance your playing. Sample the licks you will learn in this lesson:
Michael: The lesson sample is in the key of E,
using a I, IV, V blues progression. The sample actually starts on the V (B),
then IV (A) and finally resolves on the I (E). Notice how the guitar licks
follow the chord progression, the scale actually change as the progression
descends. This pattern is a bit of a twist on the progression.
Anthony21:
E and B is twisted.
Gean: But the progression is called I IV V ?
Michael:
Sure, it's based on the I, IV, V, but the beginning of this progression is
opposite: V, IV, I, make sense now?
Gean: Yes
scottieray: What's the circle for?
Michael:
The circles highlight the note names in the I, IV, V, I talked about. If you play back the tab, you will see it better on the guitar neck.
I'll send one showing the scale tones to help clarify what I'm referring to as
the I (1), IV (4), V (5).
Michael: Our first lick will play over the V of the scale.
Lick 1
Michael: Here's the jam track you can play over once you learn each lick:
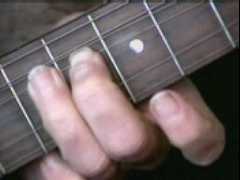
Michael: Notice the bends, use your 3rd finger to bend the notes but use the 2nd finger to support
3rd finger, this will give your hand more strength and control when bending a
note.
Whole-Step
String Bending Technique
Lick 2
Michael: You actually use the 3rd, 2nd, 1st fingers on the little string run, this lick has a cool Johnny Winter sound.
Johnny would often play these types of licks, so you can hear the influence he
had on Stevie.
I like the chromatic run, now our next lick will resolve the phrase in E:
Lick 3
Michael: Do you all see how all these licks fit together? Notice the cool hammer on and how the lick resolves in B7.
Anthony21: That double hammer on makes a nice sound.
B7 Fingering

Michael: Listen to how the melody plays over the chord changes can sound. Here's a jam track with the entire chord progression:
Michael: This jam track would be used after the intro I sent earlier, you can play chord type riffs over the I, IV, V.
Riff 1
Michael:
Now you can play the E minor blues Pattern while the standard chord progression
plays instead of how we started on the V. IV, I. the progression goes, I, IV, I, V, IV, I, V,
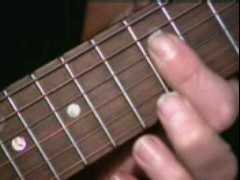
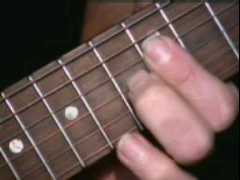
so E, A, E, B, A, E, and resolve on B. I play it on the 12th fret and hammer on the 13th fret:
Finger Barred on 12th
Hammer-on 13th Fret
Michael: You change with the progression.
I'll give you those riffs.
Riff 2 - w/thumb
Riff 2 - w/barre chord
Anthony21: Isn't this the blues scale at 12th
position? If so why do you hammer onto the 13th fret?
Michael: That's a Major 3rd grace note,
it works nicely into the riff. Notice in the pictures how I barre the 6th string with my thumb.
5th Fret Barre w/1st Finger & Thumb
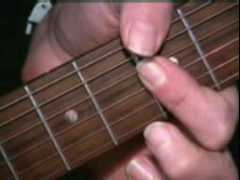
Michael: The rest of the other strings with my 1st finger,
you play this over the chord of the progression.
Anthony21: What's the point of using the thumb? I find it difficult.
Michael: It's how Stevie Ray Vaughan and
Jimi Hendrix played. They both used their thumbs all the time.
Gean: It
keeps other fingers free for doing other things.
Michael: Exactly Gean, you can use a standard barre if you want.
LarryS: The barre is more comfortable.
Michael: Here's the riff for B.
Riff 3 - w/thumb
Riff 3 - w/barre chord
Michael: You can here a lot of these
changes in the first tab I gave you. Here's a track
where you can practice the entire I, IV, V progression using Riffs 1, 2 & 3.
Here's the order:
E (I), E (I), A (IV), A (IV), E (I), E (I),
B (V), A (IV), E (I), B (V)
LarryS: You can move it up & down.
Michael: Yes Larry, ok students practice hard and see you next lesson!