Scroll through the lesson and click on notation/video/audio links to load the interactive players.
Please subscribe to get full access to all lessons for only $7.95/month PLUS 1 week free trial.

Riff Interactive lessons are
LESS expensive and
MORE interactive than alternatives!
More Info
|
|

Blues
Guitar For Beginners
Lesson
1 Lyle: This lesson is designed to help you learn
how to play rhythm guitar over a basic 12 bar blues progression. When talking
about "the 12 bar blues", this means there are 12 bars, or measures in the total
progression. There are 4 beats to a bar. By repeating this progression, you can
add lyrics and solos.
lesson sample
Lyle:
Typically, the 12 bar blues is simply made up of 3 chords, the 1, 4, and 5 chord
of whatever key you're in. There are many alternatives to this, but in this
lesson you'll focus on the 1 - 4 - 5. The 1 chord is the key chord, the 4 chord
is the sub-dominant and the 5 chord is called the dominant. Don't worry if this
is confusing you right now, just keep up with me and learn to play what I will
be showing you. You can always come back and read this later when you might have
a better idea what it is.
Lyle: These 3 chords are perhaps the most
important 3 chords of any and all songs. You'll find them used everywhere. A
simple way to figure out what the 1-4-5 chords are in most keys is simply count
on your fingers up the alphabet starting with 1 and the key you're
in.
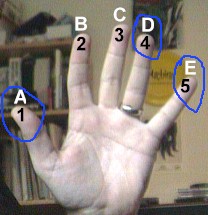
Lyle: In the key of A, the 3 chords that make up
the 1-4-5 are A, D and E. On any string you can go up 5 frets from the root to
find the 4 chord, and 7 frets from the root to find the 5 chord. Let's take
these 3 chords and turn them into dominant chords, or A7, D7 and E7. Dominant
chords have a unique dissonance to them and work great as blues
chords.
A7
chord
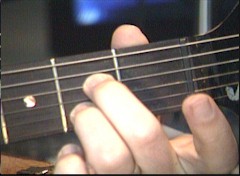
A7 chord
Lyle:
Here's is the D7, the "4" chord:
D7 chord
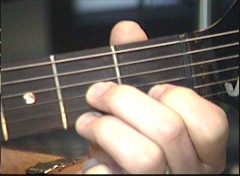
D7 chord
Lyle:
Next is the big E7 chord:
E7 chord
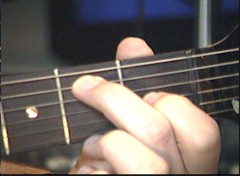
E7 chord
Lyle:
Learn how to play these 3 chords. Make sure you're hearing all the notes
clearly. There are many ways to play these chords all over the neck with
different fingerings and shapes.
Lyle: These 3 versions are in what's called the
open position because of the open strings involved. In the following lessons,
you'll learn other ways to play these chords. You're now ready to put them in a
basic 12 bar chord progression.
12 bar chord progression
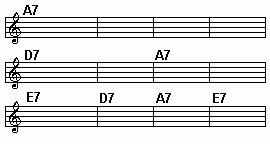
Lyle: Be sure to listen to the next TAB file, it
will help you to hear the chord being played against the groove. You'll just
strum the chord once for each measure.
12 bar chord strum
12 bar chord
strum
Lyle:
Once you have this down, try playing along to this jam track. It also has my
voice in it calling out the chord
changes.
Jam Track
- Blues in A with Voice
Lyle:
Once you have the chord progression memorized, try playing along to this jam
track without my voice.
Jam Track - Blues in A
Lyle:
Here's another way to play these 3 chords on the neck. You'll have to use your
index finger to "bar" down on the 4th, 3rd, and 2nd strings. The nice thing
about this version is that you can slide the chord shape up the neck to get from
A7 to D7 to E7. Study the tab:
A7 version 2
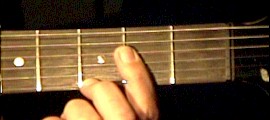
chords version 2
Lyle:
Now here's an example on how they fit into the 12 bar chord
progression:
12
bar chords version 2
12 bar chords
version 2
Lyle:
Now you have just learned two different ways to play rhythm guitar to a 12 bar
blues jam in A!
Lyle: In the next lesson you'll learn more ways
to play rhythm along to this same jam and even how to play blues solo
riffs!
Lyle: By the end of this 10 part series you'll be
on your way to becoming a blues master!
Lyle: As we go there will be other rhythm
patterns that you will learn. Then you'll see how easy it can be to apply the
new rhythm riffs to any jam in any key.
Lyle: Make sure you can play both chord styles
along to the whole 12 bar blues progression. Next lesson we'll have even more
fun!
|
<< load notation from left
|
|
<< load audio from left
|
<< load audio from left
|